Master Homemade Whipped Cream: Tips for Perfect Peaks & Flavor
Forget the wobbly, artificial "creams" you find in aerosol cans or the frozen aisle. Imagine instead a cloud of pristine, slightly sweet, and utterly luxurious topping, ready to transform any dessert into a gourmet delight. We're talking about real, homemade whipped cream, and once you discover how effortlessly simple it is to prepare, you'll wonder why you ever settled for anything less. In just a few minutes, you can create a batch of fluffy, billowy peaks that put store-bought alternatives to shame, elevating everything from a humble slice of pie to a steaming mug of hot chocolate.
Why Homemade Whipped Cream is Always the Best Choice
There's a reason grandmas and seasoned bakers have sworn by homemade whipped cream for generations. The difference in taste and texture is monumental. Store-bought versions often contain a myriad of preservatives, stabilizers, and artificial flavors that detract from the natural richness of real cream. When you make it yourself, you control every ingredient, ensuring a pure, unadulterated flavor that’s truly decadent.
Beyond the superior taste, there's an undeniable sense of accomplishment and a touch of magic in creating something so exquisite from scratch. Your friends and family will undoubtedly be impressed when they learn that the luscious topping on their dessert was whipped up fresh just for them. It's a simple act that adds a touch of elegance and care to any meal or gathering, proving that sometimes, the simplest pleasures are indeed the most profound. Plus, with recipes designed to be ready in under 10 minutes, there’s no excuse not to enjoy the real deal. If you're looking for speed and simplicity, dive into
How to Make Homemade Whipped Cream in Under 10 Minutes.
The Essential Homemade Whipped Cream Recipe: A Simple Foundation
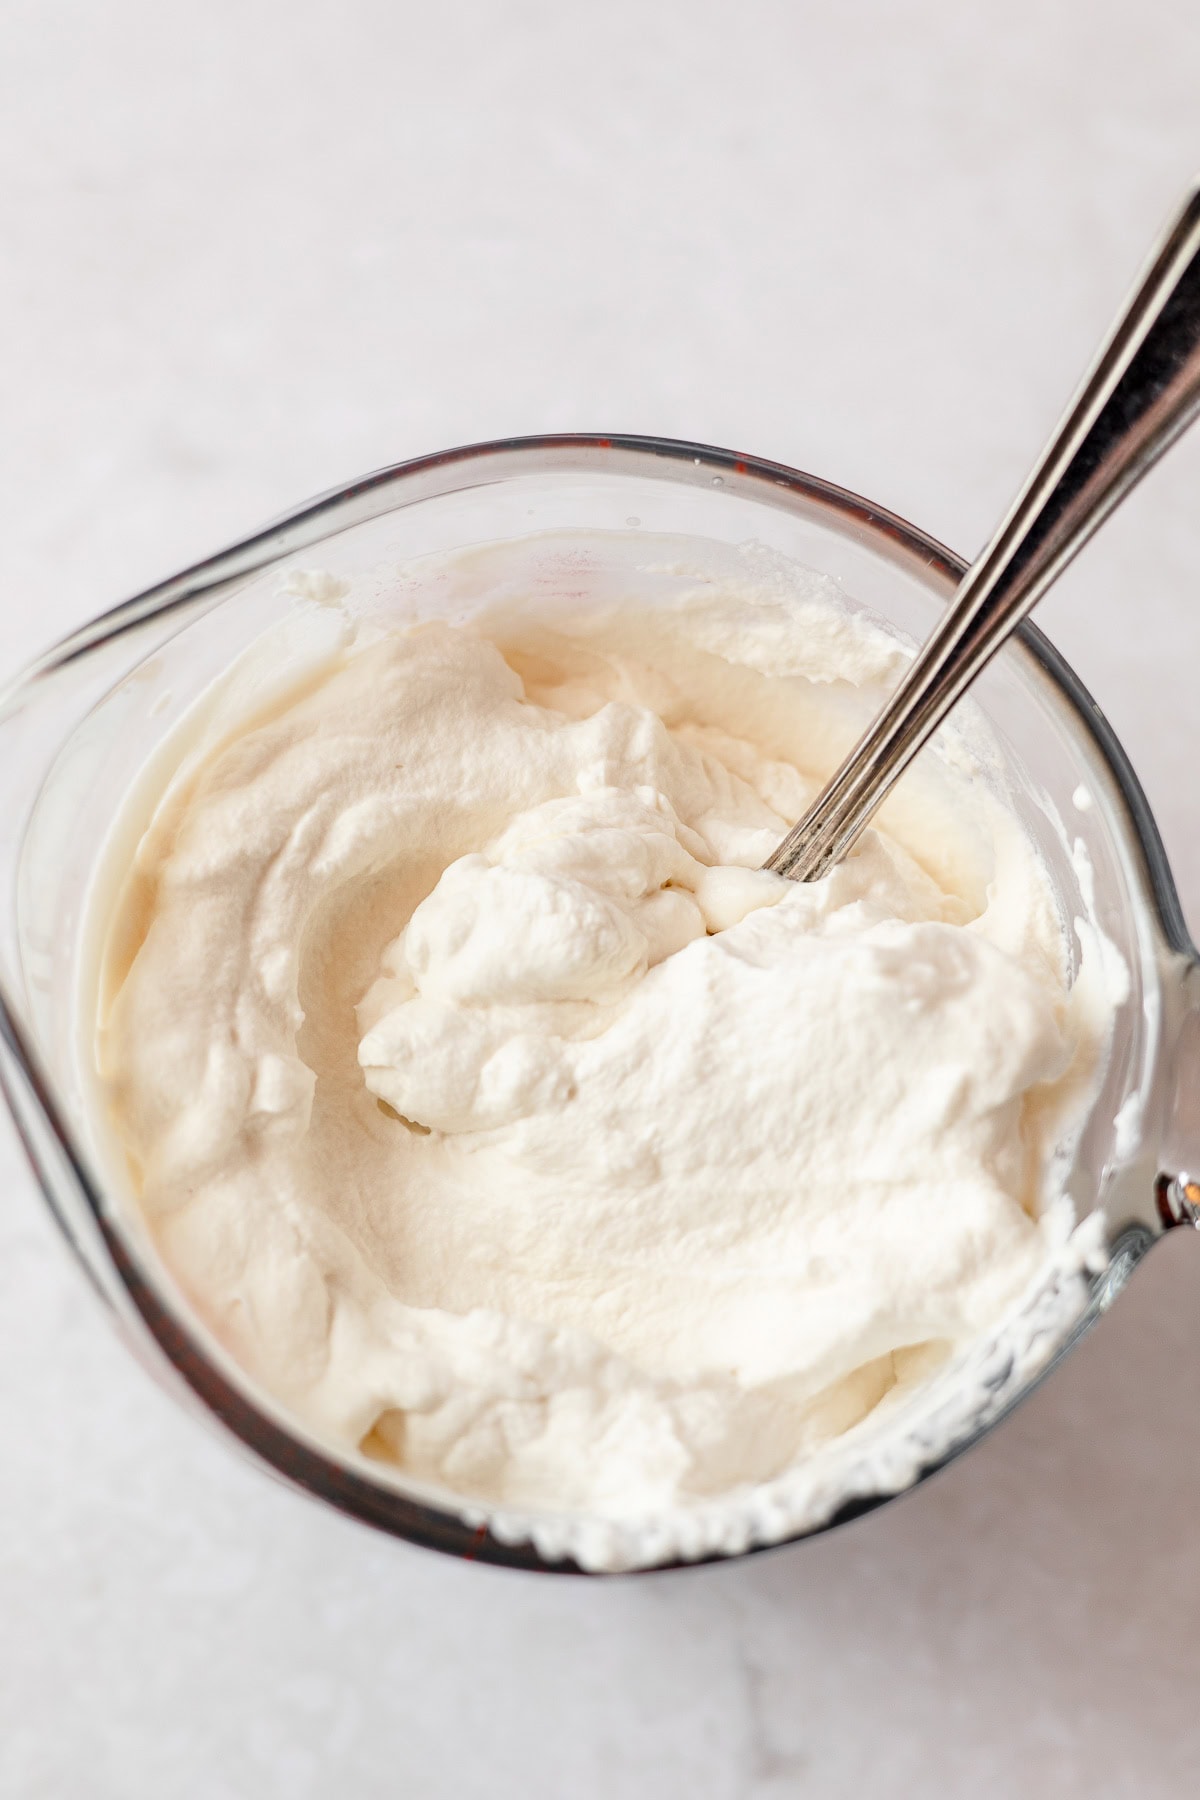
At its heart, a classic homemade whipped cream recipe is deceptively simple. It truly is just... whipped cream! The foundational ingredients are minimal, allowing the rich, creamy flavor of the dairy to shine through.
Here’s the basic blueprint for a classic batch that serves as the perfect starting point:
Classic Homemade Whipped Cream Recipe
- 1 pint (2 cups) heavy whipping cream (ensure it’s cold!)
- 2 tablespoons powdered sugar (also known as confectioners' sugar)
- 1-2 teaspoons pure vanilla extract (to taste)
Instructions:
- Combine Ingredients: Pour the very cold heavy whipping cream into a medium-sized mixing bowl. Add the powdered sugar and vanilla extract.
- Whip to Perfection: Using an electric mixer (either a stand mixer with a whisk attachment or a hand mixer) on high speed, beat the mixture.
- Watch for Peaks: Continue beating until fluffy, stiff peaks are formed. This process typically takes between 5-7 minutes, though it can vary based on your mixer's power and cream temperature. Stiff peaks hold their shape firmly when the whisk is lifted, without drooping.
- Serve Immediately or Store: Enjoy your fresh homemade whipped cream right away, or transfer it to an airtight container and store it in the refrigerator for up to 3-5 days. While some recipes suggest up to a week, using it sooner ensures the best texture and freshness.
Mastering the Art: Tips for Perfect Peaks Every Time
While the process is straightforward, a few key techniques can guarantee your homemade whipped cream recipe turns out perfectly luscious and stable every single time.
- Start with Seriously Cold Ingredients & Equipment: This is arguably the most crucial tip. Heavy cream whips best when it's very cold because the fat globules are more stable and can trap air more efficiently. For an extra edge, chill your mixing bowl and whisk attachment (or beater blades) in the refrigerator or freezer for 15-30 minutes before you begin. This significantly speeds up the whipping process and results in a more stable, airier cream.
- Choose the Right Cream: Always opt for "heavy whipping cream" or "heavy cream," which contains at least 36% milk fat. "Whipping cream" (sometimes labeled "light whipping cream") has a lower fat content (around 30-35%) and won't produce as stable or voluminous peaks. Avoid half-and-half or regular milk; they simply don't have enough fat to whip.
- The Sweetener Matters: Powdered sugar (confectioners' sugar) is preferred over granulated sugar for whipped cream. Its fine texture dissolves instantly, ensuring a smooth, grit-free finish. Granulated sugar can sometimes leave a slightly grainy texture. For sugar-free options, liquid stevia extract or other sugar substitutes that dissolve easily are excellent choices.
- Don't Overwhip (or Underwhip!): This is where attention is key.
- Soft Peaks: The cream will thicken and form soft, billowy peaks that flop over when the whisk is lifted. This is great for a looser texture, perhaps for coffee or fruit.
- Medium Peaks: The cream holds its shape better, but the tips still curl slightly. Ideal for piping or a classic dessert topping.
- Stiff Peaks: The cream stands up straight and firm when the whisk is lifted. This is the desired consistency for most applications, offering stability and structure.
- Overwhipped: If you continue to beat past stiff peaks, the cream will start to look grainy, then separate into butter and buttermilk. If this happens, it's not entirely ruined – you've just made butter! You can often rescue slightly overwhipped cream by gently folding in a tablespoon or two of fresh, unwhipped cold cream.
- Consider Your Equipment: While a stand mixer with a whisk attachment offers the most hands-free convenience, a good electric hand mixer works just as well. For the truly adventurous (or if you need a serious arm workout), a balloon whisk and some elbow grease can also get the job done, though it will take considerably longer.
Beyond the Classic: Exciting Flavor Variations
Once you've mastered the classic homemade whipped cream recipe, the real fun begins: experimentation! The versatility of this simple base allows for an incredible array of flavor profiles, limited only by your imagination. Ditch the canned stuff for good and explore the wonderful world of bespoke flavors. If you're ready to explore more variations, consider reading
Ditch Canned: 3 Easy Ways to Make Real Whipped Cream.
Here are a few inspiring ideas to get you started, building on the basic recipe:
- Sugar-Free Whipped Cream: Replace powdered sugar with 10-15 drops of liquid stevia extract (adjust to your sweetness preference). This is perfect for those watching their sugar intake, offering all the creaminess without the added sugar.
- Cinnamon Whipped Cream: Add ½ to 1 teaspoon of ground cinnamon along with the other ingredients. This is a delightful addition to apple pie, pumpkin desserts, or hot cider.
- Chocolate Whipped Cream: Sift in 1-2 tablespoons of unsweetened cocoa powder with the powdered sugar. For an even richer chocolate flavor, a tiny pinch of espresso powder can enhance the cocoa without making it taste like coffee.
- Citrus Zest Whipped Cream: Finely grate the zest of half a lemon, orange, or lime into the cream before whipping. The bright, fresh notes are fantastic with fruit tarts or berry bowls.
- Maple Whipped Cream: Instead of powdered sugar, try 1-2 tablespoons of pure maple syrup. This imparts a lovely, earthy sweetness that pairs wonderfully with pancakes, waffles, or autumn-themed desserts.
- Almond or Mint Whipped Cream: Substitute or complement vanilla extract with a few drops of almond extract (great with cherry or berry desserts) or mint extract (perfect for chocolate desserts or holiday treats). Remember, extracts are potent, so start with a small amount and taste as you go.
- Spice Blends: Experiment with a pinch of nutmeg, cardamom, or even a mix like pumpkin pie spice for seasonal delights.
Serving Suggestions and Storage
The beauty of homemade whipped cream lies in its incredible versatility. It's the ultimate creamy topping for:
- Hot beverages like cocoa, coffee, or lattes
- Fresh fruit platters, berries, or fruit salads
- Pies (apple, pumpkin, pecan, berry) and tarts
- Cakes, cupcakes, and trifles
- Pancakes, waffles, or French toast
- Ice cream sundaes or fruit crumbles
Storage: While homemade whipped cream is best enjoyed fresh, you can store any leftovers in an airtight container in the refrigerator for 3-5 days. Over time, it may lose some of its volume and become slightly less stable, but it will still taste delicious. Avoid freezing whipped cream, as it tends to separate and lose its smooth texture upon thawing.
Conclusion
Making your own homemade whipped cream is one of those simple culinary pleasures that yields immense satisfaction. It's a testament to the fact that often, the most delicious things are created with just a few quality ingredients and a little bit of care. From the pristine taste to the impressive presentation, mastering this fundamental skill will elevate your desserts and delight your loved ones. So, grab that heavy cream, chill your bowl, and get ready to whip up a batch of perfection that will have everyone asking for more.